Custom Bindings for Azure Functions
When working with Azure Functions we’re given the opportunity to reduce the amount of integration logic that we need to write ourselves, by using triggers and bindings. Microsoft provides us with a set of pre-written integrations to other services, both those in Azure such as storage account services like tables or queues, or external services like SendGrid or Twilio.
In connection with Microsoft Ignite 2020, the private preview for Azure API Connections for Azure Functions was announced at one of the monthly live streams, previously limited to only Logic Apps. This follows the ongoing trend that we will have even less need for writing custom code for common services in the future.
If we put on our developer hat, or shoes, I think we will see that as we go further along the path of integrations already written for us, users will expect to be able to use different services and platform combinations of their choice as they develop their own solutions and consume our APIs. This is the trend we see in other sectors as well with for example Bring Your Own Device (BYOD) and end user automation services such as Power Apps, and I think that API development is no exception to this. We see companies like Microsoft continually improving their services to offer flexible solutions that integrate with any system.
Where am I leading us? Well how about being able to offer a custom Azure Function binding for anyone integrating with your system? You can wrap your own API and reduce the amount of code someone else in turn needs to write to integrate with your system, as a way to shift convenience further left in the integration pipeline.
As an example today we will write an output binding in C# and use it in a couple of Azure Functions examples in C# and PowerShell. The output binding will be written to send a message using a webhook to a specific channel in Discord, a great voice and chat program. The main point of the post is not the Discord integration, so even if you’re not familiar with the service you will still be able to follow, though it’s free to use if you decide to check it out!
The final code project is found here on GitHub if you’d like to follow along in the files.
Sending a Message
Before we get into the binding code let’s find out how to send the actual message. In Discord you can have different servers with different channels. If we go to a server where we have admin privileges, or specific permissions for managing webhooks, we can find a section called integrations in the server settings. There we can create a webhook and copy the webhook URL which we will need to post a message to a channel that we choose. There are more advanced integrations available where we can create very intricate bots and cool things, but to simply post a message to a specific channel this is the only requirement.
To start with, let’s try the webhook using PowerShell so we can see what the result actually looks like.
The web request we need to make is a POST to the endpoint /webhooks/{id}/{token} of the Discord API, which happens to be the entire URL that we just got. If you want more details on how the API works you can have a look at the full documentation of the API request, but a summary is that we’re sending web request with a content parameter containing our message to the Discord API.
# Using splatting to make the code more readable
$Params = @{
  # This is the entire webhook that we copied
  Uri = 'https://discordapp.com/api/webhooks/<id>/<token>'
  Body = @{ content = 'Hello from PipeHow!' } | ConvertTo-Json
  ContentType = 'application/json'
  Method = 'Post'
}
Invoke-RestMethod @Params
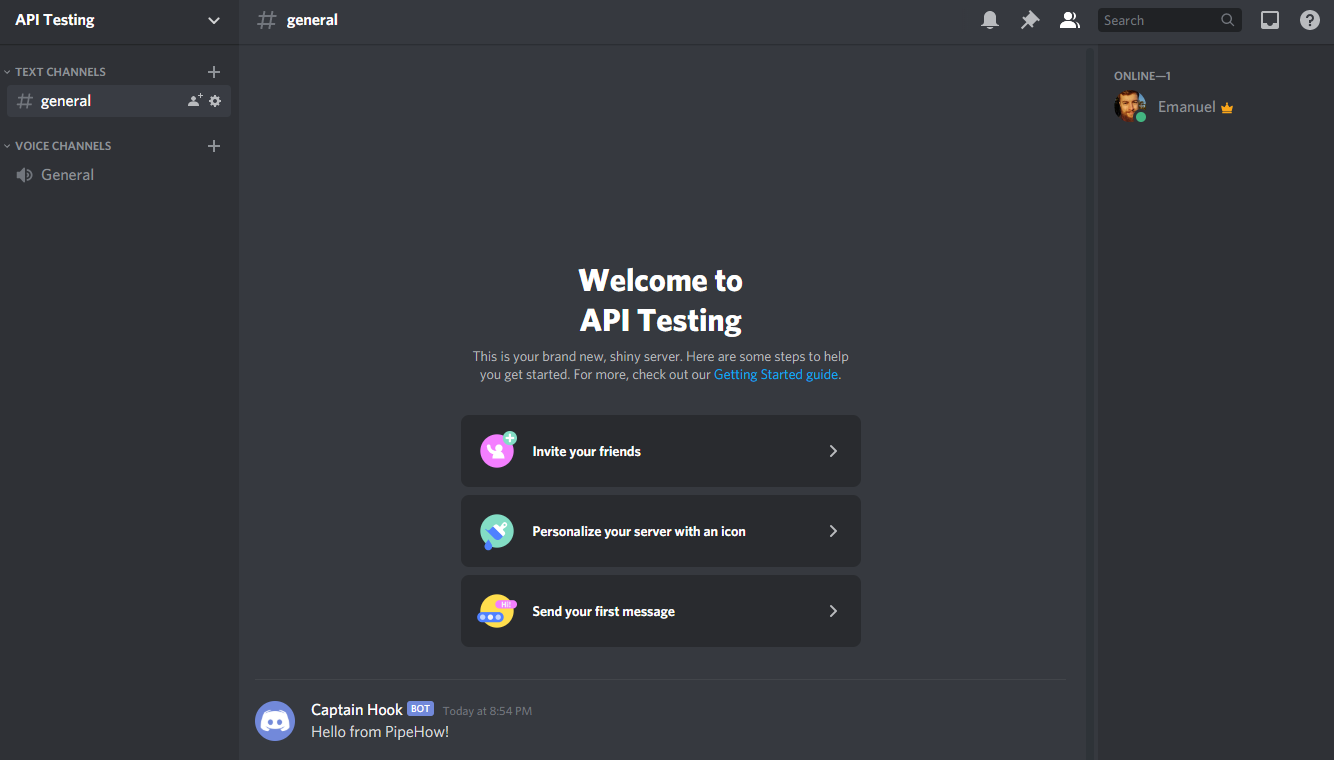
Below is a Discord server I created simply to try out the webhook, configured to send the message to the default chat called #general.
Now that we’ve seen how the API call can look from PowerShell, we’re ready to take a look at implementing it as a custom output binding in C# for use in any language supported by Azure Functions, which could really be any language if you write your own worker. That’s another topic entirely though!
Writing a Custom Binding
To create a custom binding we need to create a C# project. We can then consume the binding using any of the Azure Function languages, which I will show as a final step using both C# and PowerShell. The code may look intimidating if you’re not too familiar with C#, but I will try to explain it as we go along. There are also some other guides out there if you want another hand to hold while diving into the project, something I’ve also done while exploring the fragmented documentation of this topic.
A C# project can take many forms, but what we need for this one is to write a .NET Standard class library where we will implement our binding, actually called a binding extension, which utilizes the Azure WebJobs SDK. We could probably also write it in another .NET language such as F# if we needed to, as long as we can utilize the SDK and produce an assembly.
Binding extensions are built using the WebJobs SDK, and to utilize that in our project we will need to install the NuGet package Microsoft.Azure.WebJobs. I’m using Visual Studio, where I can simply search for the package and install it to my project using the package manager.
This is also the way many of the bindings provided by Microsoft are built, so if you’re curious about how they work there are plenty of samples and informative links in their separate open source project for Azure WebJobs SDK Extensions, including the SendGrid binding and others.
Once this is done we can get started with the code. The project will be an output binding with a few different classes, split into different files for our convenience.
- DiscordBindingStartup
- DiscordBinding
- DiscordMessage
- DiscordBindingAttribute
- DiscordAsyncCollector
DiscordBindingStartup.cs
The DiscordBindingStartup class is where our “WebJob” will start, and where our binding extension will be registered.
using Microsoft.Azure.WebJobs;using Microsoft.Azure.WebJobs.Hosting;using PipeHow;
[assembly: WebJobsStartup(typeof(DiscordBindingStartup))]namespace PipeHow{    public class DiscordBindingStartup : IWebJobsStartup    {        public void Configure(IWebJobsBuilder builder)        {            builder.AddExtension<DiscordBinding>();        }    }}
This is the entry point of our project. By implementing the IWebJobsStartup interface, which comes with a contract of sorts, we are required to implement the Configure method. There we are provided a builder object which we can add our extension to, the DiscordBinding class.
DiscordBinding.cs
The DiscordBinding class is where we define our actual binding. This class in turn uses the other classes to make sure that our binding works as we want it to. Here is where we set the behavior and properties that make our binding behave as an output binding for our Azure Functions.
using Microsoft.Azure.WebJobs.Description;using Microsoft.Azure.WebJobs.Host.Config;
namespace PipeHow{    [Extension("DiscordBinding")]    public class DiscordBinding : IExtensionConfigProvider    {        public void Initialize(ExtensionConfigContext context)        {            context.AddConverter<string, DiscordMessage>(input => new DiscordMessage { content = input });            context.AddBindingRule<DiscordAttribute>().BindToCollector(attr => new DiscordAsyncCollector(this, attr));        }    }}
The class implements the interface IExtensionConfigProvider which requires our class to implement the method Initialize that we see above. The method is provided a context of the type ExtensionConfigContext which we use to register a converter and add a binding rule.
The converter is specifically configured to convert a string input to our DiscordMessage class, by creating a new message and setting the content property in a lambda expression, an anonymous function that we set as the behavior of our converter.
Microsoft recommends the following when considering types of input and output for the binding:
An extension should provide the following:
- Bindings that expose the SDK native types.
- Bindings to BCL types (like System, byte[], stream) or POCOs. That way, customers can use the binding without having to directly use the native SDK.
- Bindings to JObject and JArray. This enables the binding to be consumed from non-.NET languages, such as JavaScript and PowerShell.
The binding rule helps us bind the input to our binding. Our binding is represented with the DiscordAttribute class which we bind to the DiscordAsyncCollector class where we will define the behavior for handling any messages processed by our binding.
This is all we need to define our binding since the input will be a very simple string forming the message. For more complex input this is where you would implement more complex converters and other bindings you may want or need.
DiscordMessage.cs
Our next class is the simple DiscordMessage which will represent the body to be sent to the Discord API. It matches the web request we made from PowerShell with the property called content containing our text message. Here we could add more functionality according to the API documentation, but for now we only want to be able to send a simple message.
namespace PipeHow{ public class DiscordMessage { public string content { get; set; } }}
DiscordAttribute.cs
The DiscordAttribute class is where we define the attribute for using our binding in an Azure Function.
using Microsoft.Azure.WebJobs.Description;using System;
namespace PipeHow{    [Binding]    [AttributeUsage(AttributeTargets.Parameter | AttributeTargets.ReturnValue)]    public class DiscordAttribute : Attribute    {        [AutoResolve]        public string DiscordWebhookUrl { get; set; }    }}
We mark it as a binding and make sure that users can provide configuration to it, in this case our only parameter is the full URL to the webhook, copied from the Discord server settings. The message to the Discord channel will be provided separately.
As we can see above there are also attributes we can configure for each property we define. By using the AutoResolve attribute we can set our parameter to read the value from either the configuration of our binding, but also allow it to resolve to an application setting of our choice.
Since we’re working with a type of connection string, or at least sensitive configuration, it would be better to use the ConnectionString or AppSetting attributes, but we will use this one for demonstration purposes that will be more clear later.
DiscordAsyncCollector.cs
The DiscordAsyncCollector is the collector that we send each message to. It implements the interface IAsyncCollector<DiscordMessage> and is the one we bound our attribute to in our binding earlier. Think of it as a fancy asynchronous pipeline of messages where we can define what happens when something passes through it.
using Microsoft.Azure.WebJobs;using System;using System.Net.Http;using System.Text;using System.Text.Json;using System.Threading;using System.Threading.Tasks;
namespace PipeHow{    internal class DiscordAsyncCollector : IAsyncCollector<DiscordMessage>    {        private static HttpClient _client = new HttpClient();        private string _webhookUrl;
        public DiscordAsyncCollector(DiscordBinding config, DiscordAttribute attr)        {            _webhookUrl = attr.DiscordWebhookUrl;        }
        public async Task AddAsync(DiscordMessage message, CancellationToken cancellationToken = default(CancellationToken))        {            try            {                var response = await _client.PostAsync(_webhookUrl, new StringContent(JsonSerializer.Serialize(message), Encoding.UTF8, "application/json"));            }            catch (Exception e)            {                Console.WriteLine(e.Message);            }        }
        public Task FlushAsync(CancellationToken cancellationToken = default(CancellationToken))        {            return Task.CompletedTask;        }    }}
This may look complicated, but starting from the top we can see that we define two private fields for later use. One of them is a HttpClient which we will use to post messages to the Discord channel, the other one is a string which we will store our webhook URL in when the collector is created, which in turn is when the function app starts and connects to our binding.
In the constructor we get the binding configuration and the attribute that holds any input from the function app. The attribute is where the user will provide the URL, which we will see clearly when we build an example function later.
The interface we implement requires us to implement the two methods AddAsync and FlushAsync which is where we define the behavior for handling the messages we send to the collector, specifically messages of the type DiscordMessage which we created earlier.
The methods themselves are fairly straightforward. By binding our attribute to this collector class, we make sure that we’re provided with the information we need. Each message delivered to our binding will be processed by the add method, converted to JSON on the fly and sent with a POST request directly to the Discord API through the webhook URL, using the HttpClient we created earlier with some very basic error handling. The flush method is only really there because we need to implement it according to the interface, otherwise we would have been fine without it for what we’re creating today.
These methods do however enable you to implement batching if you’d like to. The SendGrid binding for example uses the methods to collect the input in the add method and then send all email(s) in the flush method. You could also implement the ICollector interface in your custom binding instead, which is a wrapper around the asynchronous one. You can read more about the differences between the ICollector and the IAsyncCollector here.
Implementing a Custom Binding
Now we’re done with the binding extension, and we should be able to build our project without issues. You can publish it as an NuGet package, or copy the built library to where you need them, either way it should be usable now.
Let’s verify that by building a couple of Azure Functions!
Azure Function - C#
Still in Visual Studio, we can either add another project to the solution and add a dependency on our binding project, or create a new project in a separate solution and add a dependency to our class library through the built assembly file or published NuGet package. Since we want to be able to separate the projects I’m going to create a new solution with only the function project, and add the dependency by copying the assembly file to the new project folder.
The Project
I’m not going to go into detail on how to create an Azure Function, but to test the binding I will create an Azure Function v3 app with an HTTP triggered function, using the Visual Studio template with anonymous authorization. The project needs to have the NuGet package Microsoft.NET.Sdk.Functions installed.

I created a lib folder where I copied the built files to, and I added a dependency on the DLL file as seen in the Assemblies section. I renamed the default file containing our function code to HttpTriggerDiscord.cs and added our webhook URL to the local.settings.json file.
{ "IsEncrypted": false, "Values": { "AzureWebJobsStorage": "UseDevelopmentStorage=true", "FUNCTIONS_WORKER_RUNTIME": "dotnet", "DiscordWebhookUrl": "https://discord.com/api/webhooks/<id>/<token>" }}
The Code
The actual function file is simple, which is part of the greatness and the whole purpose of writing our binding extension. I will first show you a hopefully relatable way to add it, and then an improved way.
using Microsoft.AspNetCore.Http;using Microsoft.Azure.WebJobs;
namespace PipeHow{    public static class HttpTriggerDiscord    {        [FunctionName("HttpTriggerDiscord")]        public static string Run(            [HttpTrigger] HttpRequest req,            [Discord(DiscordWebhookUrl = "https://discord.com/api/webhooks/<id>/<token>")] out DiscordMessage discordMessage)        {            string message = req.Query["message"];            discordMessage = new DiscordMessage();            discordMessage.content = message;
            return $"Posted {message} to the Discord channel specified by the webhook.";        }    }}
Just as we normally write a function we declare the bindings using attributes. For the trigger and input we take it as a common HttpRequest and retrieve the message data from the query parameters.
As for our Discord binding we can see that we’ve set the webhook URL directly in the code. Remember the AutoResolve attribute we set earlier? That’s what defines where we can configure the settings for our binding.
Currently we’re just setting the value as with any other input to the binding, but in our next iteration we’ll improve that. Also note the required keyword out on the DiscordMessage parameter, for our Discord binding attribute.
Let’s try running the function app and posting to it using PowerShell.
PipeHow:\Blog> Invoke-RestMethod 'http://localhost:7071/api/HttpTriggerDiscord?message=hello'
Posted hello to the Discord channel specified by the webhook.
This works and posts our message, and gives us flexibility in how we provide it to our function. I feel like we can do better though. The fact that we have to get the query parameter manually, create a new message and set the content property of the message makes me feel like there’s room for improvement.
using Microsoft.Azure.WebJobs;
namespace PipeHow{    public static class HttpTriggerDiscord    {        [FunctionName("HttpTriggerDiscord")]        public static string Run(            [HttpTrigger] DiscordMessage message,            [Discord(DiscordWebhookUrl = "%DiscordWebhookUrl%")] out DiscordMessage discordMessage)        {            discordMessage = message;
            return $"Posted {message.content} to the Discord channel specified by the webhook.";        }    }}
Instead of taking the input as an HttpRequest we can directly take it as a DiscordMessage which removes the need for creating a new message and retrieving any input manually through the request.
For this to work we need to provide the input parameter as content though, since we haven’t built any logic to map or convert properties between input and the API request to Discord.
Also note that we’ve changed the webhook URL configuration in the Discord binding. Since we can let it automatically resolve to an app setting, we now define it with %DiscordWebhookUrl% instead.
If we had marked the property with AppSetting or ConnectionString we could instead have the default behavior be to search through the application settings, or even prevent the user from providing the string in the code at all. That would have been better for this specific propery, but I think this shows the behavior of AutoResolve well.
We can now send a request to it using the content parameter instead.
PipeHow:\Blog> Invoke-RestMethod 'http://localhost:7071/api/HttpTriggerDiscord?content=hello'
Posted hello to the Discord channel specified by the webhook.
Azure Function - PowerShell
If using the binding in C# was magical, we’ll need to be the ones with the wizard hat for the binding to work in PowerShell. Finding the wizard hat and spell formula took me a while, so I will go through it step by step.
I’m going to start with creating a project in Visual Studio Code this time, using the Azure Functions extension. Once more I’m creating an app with only one function in it with an HTTP trigger and anonymous authorization.
I will first remove some of the files and code from the template project:
- The code in
profile.ps1since we’re not connecting to Azure, which is the default template code. - The file
requirements.psd1and themanagedDependencyconfiguration from thehost.jsonfile, since we’re not going to have any PowerShell modules that we want to let our app manage for us. - The file
proxies.jsonsince we’re not configuring any proxies. - Any sample files created for our function.
Bindings
This is where the fun begins. If you haven’t worked with PowerShell functions before, or compared them to the ones built in C# for example, we’re not actually able to use attributes in PowerShell. So how do we add our Discord binding?
For PowerShell, JavaScript, Python and a few other function languages, the function bindings and their configuration is separated to a function.json file, where we can add bindings of the types we have registered with our app.
Registered? Well Azure Functions v2 and onwards actually only include HTTP and timer triggers by default. That may not match up with your experience, which is because of something called extension bundles. Extension bundles are added to make sure that you have what you need when working with the different service integrations.
As of writing, the current extension bundle that the PowerShell function template has registered in host.json by default includes binding extensions for:
- AzureStorage
- ServiceBus
- EventHubs
- SendGrid
- DurableTask
- EventGrid
- CosmosDB
- and more…
Each of them with a mix of different triggers and input or output bindings.
For Java, JavaScript, PowerShell, Python, and Custom Handler function apps, we recommended using extension bundles to access bindings. In cases where extension bundles cannot be used, you can explicitly install binding extensions. - Microsoft
Microsoft recommends that we use extension bundles where possible, but for situations where we need other extensions it means that we need to remove our extension bundle completely and then add the specific bindings we want instead.
This means that we need to remove the extensionBundle section from the host.json file.
In C# we could add our binding extension as a dependency to our project, or rather our project file, but in PowerShell there’s no such thing.
Or is there?
The Hidden Project
It turns out that explicitly installing an extension binding actually means registering it in a .csproj file, a .NET project file, even if you’re running PowerShell.
A simple way to create a project file for your function app is by using the Azure Function Core Tools. Running the command below will install any added extensions, but even if we haven’t added any extensions it will still create the project file for us so we can add to it manually.
func extensions sync
Now that we’ve cleaned up our template project and created our extensions.csproj file we’re ready to install our binding extension, and then implement the same functionality as we did in the C# function previously.
The first thing we’ll do is to create a separate folder called extensions that we can copy the DiscordBinding assembly to. We could also call it lib or anything else that we may find accurately describes the contents.
Dropping the assembly in there will complete our project structure, which now looks like this.
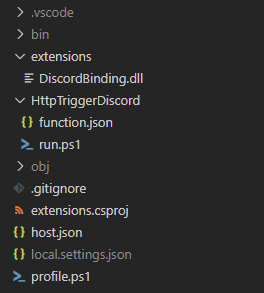
The .vscode folder was created with our template, but if you don’t recognize the other greyed out folders, don’t worry, they were created by the command we just ran together with the project file. The bin folder will play a central role in our extension installation.
Installing a Custom Binding
We’ve copied our DiscordBinding assembly to the project, so now we just need to make sure that we can use it as a binding by installing it to our app.
<Project Sdk="Microsoft.NET.Sdk">
  <PropertyGroup>
    <TargetFramework>netcoreapp3.1</TargetFramework>
	<WarningsAsErrors></WarningsAsErrors>
	<DefaultItemExcludes>**</DefaultItemExcludes>
  </PropertyGroup>
  <ItemGroup>
    <PackageReference Include="Microsoft.Azure.WebJobs.Script.ExtensionsMetadataGenerator" Version="1.1.3" />
  </ItemGroup>
</Project>
This is the extensions.csproj file that was created, and also where things start becoming a little less clear. Normally a binding extension is a NuGet package, even behind the scenes of the bundles, and we can add package references to our project file such as the one added above by default.
The packages are then retrieved when we install the extensions, which puts them in the bin folder, in turn used by our function.
Our binding is not a NuGet package registered in a feed though. It’s currently an assembly file, which means we need to add it as an assembly.
<Project Sdk="Microsoft.NET.Sdk">
  <PropertyGroup>
    <TargetFramework>netcoreapp3.1</TargetFramework>
	<WarningsAsErrors></WarningsAsErrors>
	<DefaultItemExcludes>**</DefaultItemExcludes>
  </PropertyGroup>
  <ItemGroup>
    <PackageReference Include="Microsoft.Azure.WebJobs.Script.ExtensionsMetadataGenerator" Version="1.1.3" />
    <Reference Include="DiscordBinding">
      <HintPath>.\extensions\DiscordBinding.dll</HintPath>
    </Reference>
  </ItemGroup>
</Project>
We can add a reference to it as above, specifying the relative path to the file to ensure that our function app adds it to the bin folder with our extensions. Again, this happens when the extensions are installed, but also when our function app is built.
Built as in running dotnet build to compile the .NET project, something we don’t generally connect with function apps running PowerShell. This is another thing that has been magically solved for us, but it’s something we should be aware of.
For our purposes we can run another command from the core tools.
func extensions install
Running the command will give us a response saying:
No action performed because no functions in your app require extensions.
By looking in the bin\extensions.json we can confirm that indeed, no extensions were installed.
{
  "extensions":[
  ]
}
How come? If we build our project using the dotnet build command with some more detail we can actually find what’s going on.
dotnet build --verbosity detailed
This will output a bunch of information in the console, but towards the end we can see something pointing at a solution.
Found 4 assemblies to evaluate in 'C:\PipeHow\DiscordBinding\bin\Debug\netcoreapp3.1':
  DiscordBinding.dll
    Resolving assembly: 'System.Runtime, Version=4.2.2.0, Culture=neutral, PublicKeyToken=b03f5f7f11d50a3a'
    Assembly 'System.Runtime' loaded.
    Resolving assembly: 'Microsoft.Azure.WebJobs.Host, Version=3.0.19.0, Culture=neutral, PublicKeyToken=31bf3856ad364e35'
    Resolving assembly: 'Microsoft.Azure.WebJobs.Host, Culture=neutral, PublicKeyToken=null'
    Cannot load 'Microsoft.Azure.WebJobs.Host'. Aborting assembly resolution.
    Unable to find fallback for assembly 'Microsoft.Azure.WebJobs.Host'. System.IO.FileNotFoundException: Could not load file or assembly 'Microsoft.Azure.WebJobs.Host, Culture=neutral, PublicKeyToken=null'. The system cannot find the file specified.
If we think back to when we created our binding extension, we installed a NuGet package called Microsoft.Azure.WebJobs to our project. We seem to be missing a dependency here, and an easy way to fix it is to simply add the same reference as we have in the DiscordBinding.csproj from our binding project.
<Project Sdk="Microsoft.NET.Sdk">
  <PropertyGroup>
    <TargetFramework>netcoreapp3.1</TargetFramework>
	<WarningsAsErrors></WarningsAsErrors>
	<DefaultItemExcludes>**</DefaultItemExcludes>
  </PropertyGroup>
  <ItemGroup>
    <PackageReference Include="Microsoft.Azure.WebJobs" Version="3.0.19" />
    <PackageReference Include="Microsoft.Azure.WebJobs.Script.ExtensionsMetadataGenerator" Version="1.1.3" />
    <Reference Include="DiscordBinding">
      <HintPath>.\extensions\DiscordBinding.dll</HintPath>
    </Reference>
  </ItemGroup>
</Project>
If we once more try to install our extensions using the core tools, we can take a look at the extension file in the bin folder and find that it’s now registered properly!
{
  "extensions":[
    { "name": "DiscordBinding", "typeName":"PipeHow.DiscordBindingStartup, DiscordBinding, Version=1.0.0.0, Culture=neutral, PublicKeyToken=null"}
  ]
}
Using a Custom Binding
Finally arriving at our function, let’s take a look at using the binding in the function.json file.
{
  "bindings": [
    {
      "authLevel": "anonymous",
      "type": "httpTrigger",
      "direction": "in",
      "name": "Request",
      "methods": [
        "get",
        "post"
      ]
    },
    {
      "type": "http",
      "direction": "out",
      "name": "Response"
    },
    {
      "type": "Discord",
      "direction": "out",
      "name": "Discord",
      "DiscordWebhookUrl": "%MyWebhookUrl%"
    }
  ]
}
The first two bindings are the defaults, our trigger and output binding for the HTTP response. The third one is all we need to use our custom Discord binding in PowerShell, together with the DiscordWebhookUrl configuration passed to our binding, which we here resolve to an app setting with the name MyWebhookUrl configured in our local.settings.json file.
If we had used the AppSetting attribute instead of AutoResolve for the webhook URL property, the binding configuration could instead have looked like below, forcing the user to provide the value in an application setting and separating the secret string from the code completely.
{
  "type": "Discord",
  "direction": "out",
  "name": "Discord",
  "DiscordWebhookUrl": "MyWebhookUrl"
}
Even better would probably have been to use the ConnectionString attribute, since that’s really what the URL represents.
{
  "type": "Discord",
  "direction": "out",
  "name": "Discord",
  "connection": "MyWebhookUrl"
}
If we chose to set either of them to a default value of MyWebhookUrl we could instead have removed the entire webhook configuration from this file, and let the binding look for the value in the application settings.
{
  "type": "Discord",
  "direction": "out",
  "name": "Discord"
}
Push-OutputBinding Discord
Now that we’ve finally registered, installed and configured our binding, we can use Push-OutputBinding to send a message to Discord. Below is a quick demonstration on how to replicate the behavior that our function written in C# had.
using namespace System.Net

param($Request, $TriggerMetadata)

$Message = $Request.Query.Message
if ($Message) {
    Push-OutputBinding -Name Discord -Value $Message
}

Push-OutputBinding -Name Response -Value ([HttpResponseContext]@{
    StatusCode = [HttpStatusCode]::OK
    Body = "Posted $Message to the Discord channel specified by the webhook."
})
That’s it!
If we would combine input validation against a schema, with a more sophisticated converter in our binding extension, we can start grasping at some really cool opportunities for what’s possible.
Something to keep in mind for the PowerShell function is that the bin folder needs to be provided together with the app when deploying it somewhere. If you’re deploying through a CI/CD pipeline, make sure the extension registrations make it all the way to Azure together with the app.
Conclusion
This was quite a journey to both explore and write about. There is a lot of functionality which we haven’t covered at all. There’s input bindings, more complex converters and data formatting, even custom triggers that are even less documented than input and output bindings when searching around the web.
As for registering the extension to use it in PowerShell, I had to figure that one out myself. If you find that there’s a better way, please do tell!
Once more, the final code from the post can be found here on GitHub, with the notable difference being that the webhook URL is a set to a ConnectionString.
When researching for this blog post there were also a few mentions of an application setting called AzureWebJobs_ExtensionsPath which is supposed to let the app recognize extensions if set to the parent folder of the extensions, but I was not able to make it work, or at least it didn’t make a difference during my experimentation.
As mentioned in the introduction, Microsoft is also evaluating the option of using app connections in Azure Functions. Maybe it’s already live when you’re reading this? It would reduce the need for integration logic for a lot of services even more, but since there are so many systems out to write cool integrations with I still think there’s a place for being able to create a custom Azure Function binding for your API or service, and letting customers or users integrate with it themselves.
I’d love to hear what you find when digging around, so let me know if you make something cool!
Below are some more sources I found useful to understand how binding extensions work, in addition to the ones linked to throughout the post.