Exploring Azure Logic Apps (Preview)
- 'The New VS Code Extension'
- 'Logic Apps v2'
- 'Stateful vs Stateless'
- 'Creating the Logic App'
- 'Running the Logic App'
- 'Conclusion'
Microsoft Ignite is underway and as always there are many fun and cool news being released. Something that caught my eye that I just had to dive into was the Public Preview for the new Logic Apps powered by the Azure Functions containerized runtime, letting you run Logic Apps locally, on-premises or wherever you need to. If you’re like me and happen to be a fan of Azure Functions you will love this, because there are some really exciting changes coming!
Don't let this go unnoticed from #MSIgnite - #Azure Logic Apps @logicappsio was just updated to be able to run locally (or wherever, really) like @AzureFunctions with a new VS Code extension. Also cleaning up the designer and adding stateless workflows!https://t.co/k6qpMgw4wU
— Emanuel Palm (@PalmEmanuel) September 22, 2020
The New VS Code Extension
Let’s start with some clarification:
- There’s an old VS Code Extension - Azure Logic Apps
- There’s a new VS Code Extension - Azure Logic Apps (Preview)
Don’t confuse the two like I did initially. The old one has been around for a while and is perfectly usable for developing Logic Apps locally (although they need to be deployed to Azure to run), and it is also still in preview. The new one instead is literally named “Logic Apps (Preview)” and is as of writing version 0.0.1.
It’s not that the new extension simply works differently, it creates an entirely new resource type in Azure called “Logic App (Preview)”! For now, the only way to create the new Logic App type is using the new VS Code extension. There are some notable differences between the old Logic App and the new one, as we will see throughout in this post.
According to Microsoft’s guide on getting started using the extension, there are some prerequisites. In short you need:
- An Azure Subscription
- Visual Studio Code to 1.30.1 or higher
- The VS Code extension Azure Account to sign in
- The VS Code extension C# for F5 run functionality
- Azure Functions Core Tools version 3.0.2931 or 2.7.2936
If you’re thinking that you’re probably up to date with the core tools, play it safe and double check, because as of writing both of these versions were released yesterday. Verify after installation that your PATH variable points to the correct version by running func --version.
As of writing, the extension does not work if you have .NET 5 installed, which I reported as an issue on their GitHub. If you happen to encounter this problem there is a workaround other than uninstalling .NET 5 specified in the issue linked, although I did not need to try it.
You will also need to install Azure Storage Emulator, which is more simple than it seems.
Logic Apps v2
From here on out I will be referring to the new Logic App (Preview) as v2 for simplicity. One of the new features that gets me excited is that thanks to the Functions runtime it has support for multiple workflows in the same app!
As the extension was just released today I suspect there will be some updates in the near future. Luckily VS Code can assist us with keeping track of that, so I suggest making sure that automatic updates are enabled, which you can set under Preferences > Settings > Features > Extensions > Auto Check Updates & Auto Update.
Then you will want to verify two more settings to use the new extension. Still in settings, under Extensions > Azure Logic Apps Preview, make sure that Azure Logic Apps V2: Panel Mode is enabled and set Project Runtime according to your installed version of Azure Functions Core Tools.
Using the new VS Code Extension for Logic Apps we can now create a Logic App project directly from our editor.
Stateful vs Stateless
Something new that we get to choose between for a Logic App workflow is Stateful and Stateless. There are some differences that you can read about, but here is a simple comparison.
| Feature | Stateful | Stateless |
|---|---|---|
| Records Event Data | Yes | No |
| Outage Resiliency | Yes | No |
| Run History | Yes | Can be enabled |
| Cost | Expensive | Cheap* |
| Performance | Slower | Faster* |
* This is a perk of stateless workflows thanks to no external storage dependency.
Microsoft also mentions the running time for the two workflows. Stateful workflows can run for up to a year whereas “stateless logic apps have shorter runs that are usually no longer than 5 minutes”, and although that’s not a direct or fair comparison I feel like it gives us an idea of what we can expect the difference to be in terms of applying them for different purposes.
Creating the Logic App
The first thing to do is to create a project using the extension, where we will also be prompted to create our first workflow. For this post I will be exploring the new stateless workflow.
If you’ve worked with Azure Functions you will most likely also recognize the project structure, and if you’ve worked with the previous Logic App extension at all, or created Logic Apps using code in some way, you will recognize the structure of the file.
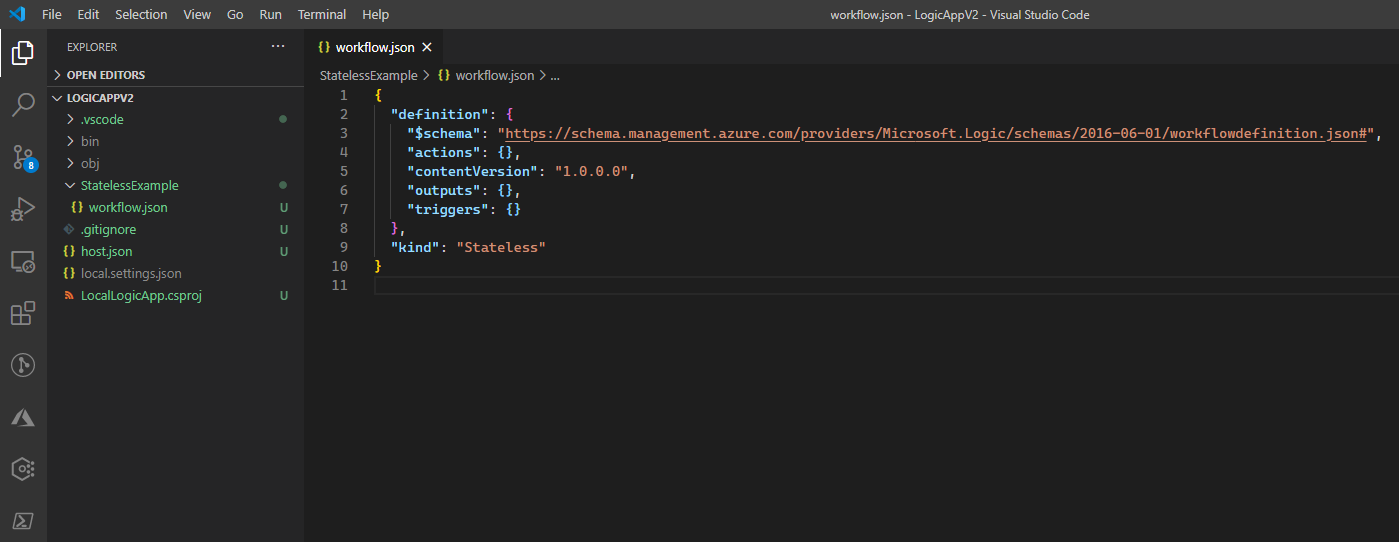
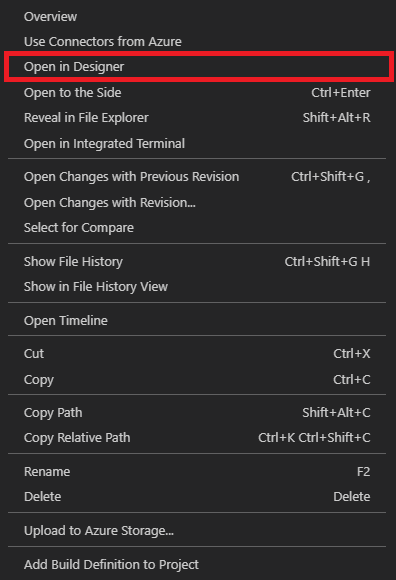
There is a notable difference though, being the kind property. What was previously the definition of a Logic App has been moved into a definition property, and we’ve been given a new property determining the type of workflow, in our case stateless. If we right click our workflow.json file we can see an option that seems intriguing.
If you clicked it and you’re now wondering why it’s taking so long for the extension to “start the workflow design time api”, this is when we need to start our Storage Emulator. Depending on where you installed it, the command will look something like this.
& 'C:\Program Files (x86)\Microsoft SDKs\Azure\Storage Emulator\AzureStorageEmulator.exe' start
If we now try to open the designer of the workflow again we will get some options. For the first one I will choose to use the connectors from Azure, and then I will simply specify a resource group for the app.

This is so cool! Without leaving VS Code for a single moment we can still get the functionality of the new graphical designer to create Logic Apps!
If you’ve worked with the old VS Code extension you may find similarities in the sense that it also has a way to visually see the Logic Apps you’ve deployed to Azure from VS Code, but not to this extent.
Looking closely you might see that there is not a great deal of triggers, and you would be correct. For stateless Logic App workflows we are currently somewhat limited in triggers and connectors, though that might as with many other things come to change in the future.
If we open the workflow.json file and the designer in VS Code in the split editor view we can see the changes live when we save the file or designer, which is really neat! Let’s start by adding an HTTP trigger since it’s one of the simpler ones to test with.
{
    "definition": {
        "$schema": "https://schema.management.azure.com/providers/Microsoft.Logic/schemas/2016-06-01/workflowdefinition.json#",
        "actions": {},
        "triggers": {
            "manual": {
                "type": "Request",
                "kind": "Http",
                "inputs": {
                    "schema": {}
                }
            }
        },
        "contentVersion": "1.0.0.0",
        "outputs": {}
    },
    "kind": "Stateless"
}
There are a lot of fun APIs out there that you can use for free, so as our next step let’s request some data from one of them.
Did you ever play Age of Empires II growing up? It’s a fantastic game. How does it relate to this post? As with many other great things, there’s an API for it! Or should I say, for data from it.
PipeHow:\Blog> Invoke-RestMethod 'https://age-of-empires-2-api.herokuapp.com/api/v1/civilizations'
If you run the code above you will get a list of all the civilizations from the game. Let’s implement the same retrieval of data, but as an action in our Logic App!
Action - HTTP
Getting the data in the Logic App isn’t much harder than running the PowerShell command. Adding an action of the type HTTP we can see some configuration needed. Only a few of the properties need to be set for the command to work though, since there’s no need for authentication or more tricky things.
| Field | Value |
|---|---|
| Method | GET |
| URI | https://age-of-empires-2-api.herokuapp.com/api/v1/civilizations |
| Headers | Key: Accept - Value: application/json |
Although not the focus of this post, we could now use the output of the HTTP action for something useful by parsing it to a more readable format in the following actions, and for example send it as an email. If we created a stateful workflow instead we would have different options but as mentioned before we’re somewhat limited to which connections we can use based on the stateless workflow type, so we will simply pretend like our Logic App is doing something with the data. We will then return the JSON data to whichever source will invoke our app, in our case PowerShell.
Action - Response
The second and last action is as simple as it gets, we add a Response action and set the body to the output of the previous HTTP action.
Running the Logic App
If everything was set up properly we should now be able to simply press F5 and run the app just as with a local Azure Function. Doing this should present you with a nice endpoint in the terminal, and you might be inclined to simply invoke it using PowerShell as you do with a Function, but that won’t work. After running the Logic App we can right click the workflow.json file once more, and click the top option “Overview”. This brings up a window with information about our app, including a “Callback URL” including the parameters that we need to provide, such as the API version and a Shared Access Signature (SAS) key. The key is used by our local Logic App when sending requests to Azure for the actual connectors that the actions and triggers are part of.
PipeHow:\Blog> Invoke-RestMethod 'http://localhost:7071/api/StatelessExample/triggers/manual/invoke?api-version=2020-05-01-preview&sp=%2Ftriggers%2Fmanual%2Frun&sv=1.0&sig=<your-saskey>'
Below is the entire stateless workflow of the new Logic App we created. If we wanted to we could create another workflow within the same app, and integrate them using the different connectors available, which opens up for a lot of possibilities.
{
    "definition": {
        "$schema": "https://schema.management.azure.com/providers/Microsoft.Logic/schemas/2016-06-01/workflowdefinition.json#",
        "actions": {
            "Get_Age_of_Empires_Civilizations": {
                "type": "Http",
                "inputs": {
                    "method": "GET",
                    "uri": "https://age-of-empires-2-api.herokuapp.com/api/v1/civilizations",
                    "headers": {
                        "Accept": "application/json"
                    }
                },
                "runAfter": {}
            },
            "Response": {
                "type": "Response",
                "kind": "http",
                "inputs": {
                    "statusCode": 200,
                    "body": "@body('Get_Age_of_Empires_Civilizations')"
                },
                "runAfter": {
                    "Get_Age_of_Empires_Civilizations": [
                        "Succeeded"
                    ]
                }
            }
        },
        "triggers": {
            "manual": {
                "type": "Request",
                "kind": "Http",
                "inputs": {
                    "schema": {}
                }
            }
        },
        "contentVersion": "1.0.0.0",
        "outputs": {}
    },
    "kind": "Stateless"
}
As a final step we can use the extension to deploy the app to Azure, where we get a few options that once again remind us that the Logic App v2 builds on the same foundation as Azure Functions, and it’s just as easy to use. A notable difference is however that the Logic Apps v2 service does not have support for consumption plans.
Once it’s deployed you can work with it in the portal instead if you’d like, though I’m not sure why you would. I’m worried that I’ll never tab out of VS Code if this trend continues. If you do however decide to explore the resource in the portal, you will definitely notice a few more similarities between Azure Functions and the newly deployed Logic App v2.
Conclusion
You can tell that the designer is still in it’s early stages, as some controls and error text gets stuck visually, but disregarding that I really like what I’m seeing.
Serverless is still just lovely! I can focus on the fun part, writing my code or implement the integration logic now completely without leaving my editor, and I let someone else handle whatever infrastructure needed.
I’m a big fan of Azure Functions and I like the direction that the new Logic Apps v2 are taking! What do you think?