Microsoft Graph API with PowerShell
When working with Azure and PowerShell, eventually a time comes where you want to get data from Azure AD, or another part of Azure not supported by the Az modules. There is a module called AzureAD, which is (almost) only supported by Windows PowerShell, i.e. up to PowerShell 5.1. A lot of the times when we write PowerShell for Azure, it is to be run in Azure. That makes you end up in a tough spot if you want to build snappy Azure Functions, as they run newer versions of PowerShell.
Enter Microsoft Graph, the “gateway to data and intelligence in Microsoft 365”. Graph exposes a standardized REST API which lets you integrate with tons of different parts of Azure, whether you want to find information about devices, users, email or group memberships in Azure AD.
The hardest thing about getting started with Graph is to authenticate to it and get a token with rights to talk to the rest of the API. This is what we will focus on today, although I will also demonstrate how to request information from Azure AD.
Connecting to Graph
There are many ways to get a token from the Graph API, depending on if you are trying to connect to Graph using an application, a user account, end-user login, or a combination of them. The different ways to get a token are called authentication flows, or auth flows, and choosing between them depends on what type of application you are building.
In our case we want to connect from a simple PowerShell script, and since we would like to do it without user interaction or logging in we can choose the client credentials grant flow. Using this flow we will need to create an app registration in our Azure AD and give it API permissions for Graph.
Registering our App
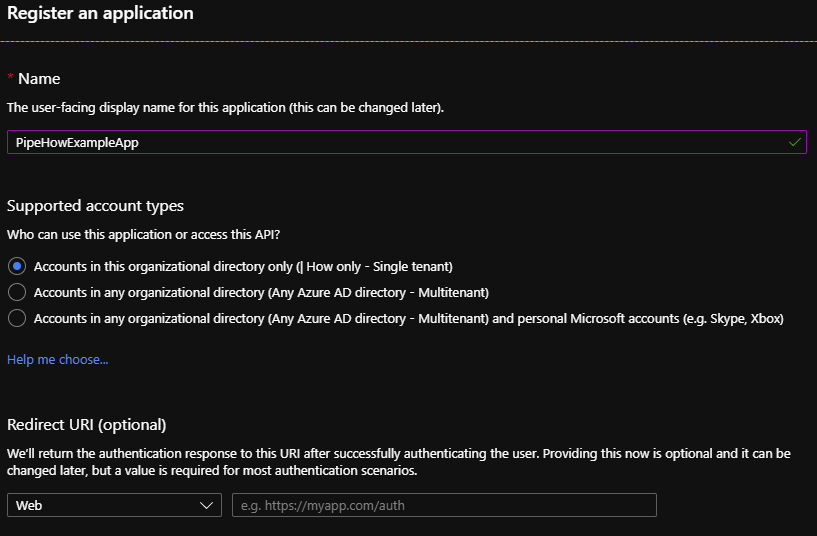
In Azure Active Directory, we first need to register an app under “App registrations”.
Clicking “New registration” will let us choose some information about our app, such as if we want it to be single- or multi-tenant.
API Permissions
Once the application is created we need to grant it API permissions for the part of the Graph API that we want to access, we do this under “API permissions”. By default our app has a delegated access to User.Read, meaning that the app has access to read the profile of users that sign in and consent to the app.
API permissions can be one of two types, delegated permissions and application permissions. Delegated permissions are used to allow your application to act on behalf of the authenticated user, whereas application permissions gives your app permissions to work without a user account.
Delegated permissions work as a filter, and are only as good as the permissions of the user logging in. The app would for example never be able to change user data if the user logging in only has access to read the directory, because the identity used is the user’s. On the other hand if the app only has read access, you would still never be able to change data through the app, even if the authenticated user is a global administrator.
Since we would like to have our app work on its own we will remove the default permissions and add only the ones we need, according to the principle of least privilege.
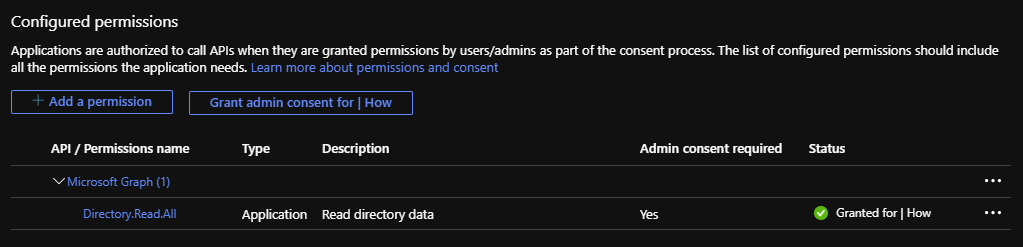
Clicking “Add a permission” will bring up a menu of all the APIs that we have access to and can grant the application. The biggest box button that we can click, as of writing, is Microsoft Graph, and it’s also the one we’re using today. Under the different tabs are many other APIs that the app can integrate to, have a look around!
I will add the Application permission Directory.Read.All which “Allows the app to read data in your organization’s directory, such as users, groups and apps, without a signed-in user”. The application now requires consent from an administrator before the new permission can be used.
Once the app has been granted admin consent for the new permissions we are ready to get into some code!
We can also see what permissions our app has access to by browsing to the app under “Enterprise applications”.
Creating a Secret
To prove that the code requesting the token “is” the application, or rather that the person implementing the code has access to the registered application that is given API permissions, we need to create a client secret for the application that we send in the auth token request.
This is done in the section “Certificates & secrets” of the app. The name of the secret can be used as an identifier to know which secret is used where, in case you use several secrets for different uses. Make sure to copy and save it somewhere after creating it as it will not be readable again once you leave the page.
Parameters
To get an auth token using the client credentials flow we will need some information for the parameters of the request.
Tenant Id
The tenant or directory id is the id of your Azure AD tenant and can be found in the overview section of your Azure AD in the portal, among other places.
Client Id
The client or application id is the id of your registered app, found in the overview section of the registered app.
Scope
The scope parameter defines what parts that the auth token should be valid for. In our case we can use https://graph.microsoft.com/.default which will give us a token with the scope of all API permissions that the app has been granted. You can use this as a tool for more granular control, to restrict what the token should be valid for if the app has other permissions that will not be utilized by this specific token.
Client Secret
The secret that we previously created for our app.
Grant Type
The grant type decides the auth flow, we are using client_credentials to let the app work without user interaction.
Requesting a Token
We now have what we need to retrieve a token, so let’s assemble a body for our token request.
# Create a hashtable for the body, the data needed for the token request
# The variables used are explained above
$Body = @{
    'tenant' = $TenantId
    'client_id' = $ClientId
    'scope' = 'https://graph.microsoft.com/.default'
    'client_secret' = $ClientSecret
    'grant_type' = 'client_credentials'
}

# Assemble a hashtable for splatting parameters, for readability
# The tenant id is used in the uri of the request as well as the body
$Params = @{
    'Uri' = "https://login.microsoftonline.com/$TenantId/oauth2/v2.0/token"
    'Method' = 'Post'
    'Body' = $Body
    'ContentType' = 'application/x-www-form-urlencoded'
}

$AuthResponse = Invoke-RestMethod @Params
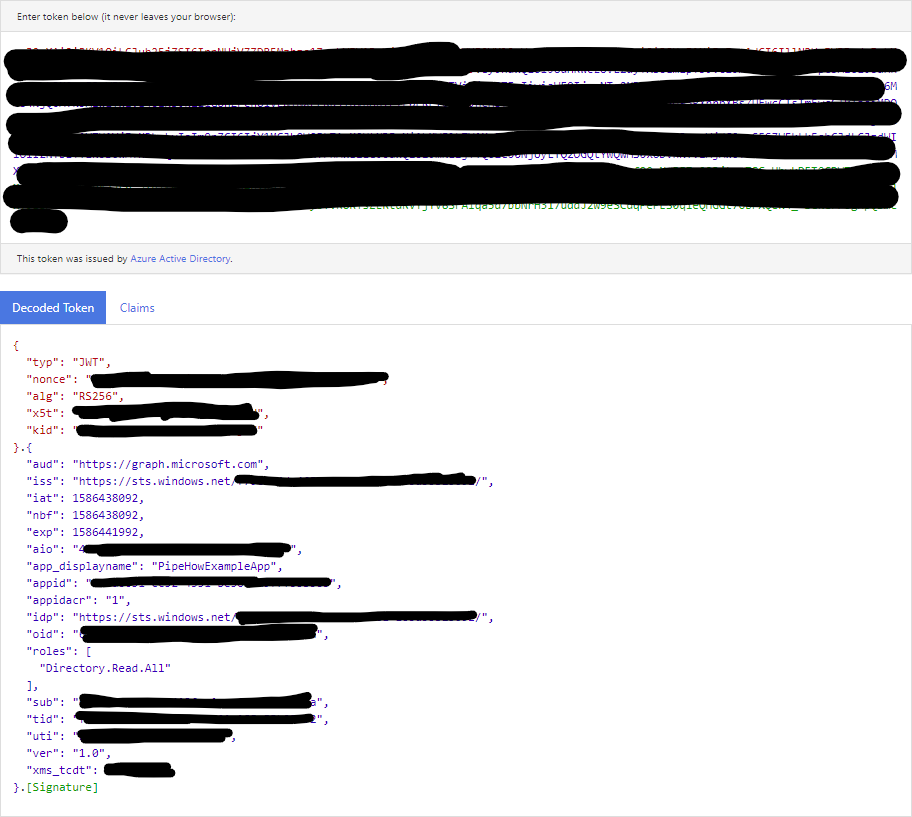
We now have a graph token! The response contains metadata such as expiration time, and the token itself consisting of a long encoded string in a format called JSON Web Token (JWT). A JWT can be decoded to see more data such as what account or application it is for and what scopes are included, for example using Microsoft’s own decoder.
Getting Data from Azure AD
Now that we have a token we can simply send the token in the headers of our API request to read or modify whichever resource the token grants us access to, in this case to read the directory. As an example we can send a request to the /users endpoint.
$Headers = @{
    'Authorization' = "Bearer $($AuthResponse.access_token)"
}

$Result = Invoke-RestMethod -Uri 'https://graph.microsoft.com/v1.0/users' -Headers $Headers
$Result now contains all the users in the specified Azure AD, with basic information about them.
As you can see, the hardest thing about graph is to authenticate, but don’t let that intimidate you! There are many other ways to authenticate and work with Graph, this post simply showcased one to get you started. Definitely check out some other ways, for example by logging into your own account, consenting to an application and getting a personal token with the rights of your account!