PowerShell, Azure, RSS and Company IPOs
I dabble in personal finance sometimes, and I found a few years back that I have a healthy (so far) interest in the stock market. I happen to live in Sweden where we have our own market(s), but I try to look for international investing opportunities as well. The problem with trying to keep up with what’s going on in the world without reading international news papers daily is that you often get the news second-hand. Reading up on financial news after everyone else sometimes means you’re already at a disadvantage, and thus I set out to check another one of the boxes on my ever-growing list of things I have yet to learn - where to find information on which companies are entering the stock market, this time in the US. There are of course plenty of sites listing them, but I wanted the news when they came out, not when someone had already both researched and written about them.
I promise we’ll get into the nitty gritty tech and code, but let me first briefly explain how it works to make sense of the rest of this post.
In the US, the first step towards the stock market and an initial public offering (IPO) is taken by filing a so-called “S-1”, a form sent to the U.S. Securities and Exchange Commission (SEC). In the S-1 the company details a lot of things on the what and the why, and as an investor the document can come in handy when analyzing the company. There is of course a difference between filing the S-1 and going through with the entire process of the IPO, but for this post I will use the terms interchangeably.
Finding S-1 Filings - The RSS Feed
The first step was to find out where to find the filings, and it turns out that the SEC has something called the “Electronic Data Gathering, Analysis, and Retrieval” system, sounding more impressive than its acronym EDGAR. It does however allow for filtering, and has support for RSS which lets us tap into the feed on a regular basis, so it will work for our purpose. Clicking around on the site led me to the Latest Filings Received and Processed at the SEC, a list that I quickly found out supported URL queries by playing around with the controls. Clicking the button “Retrieve Filings” changed the URL to reveal several options, and clicking “Next 40” extended the list of parameters.
https://www.sec.gov/cgi-bin/browse-edgar?action=getcurrent&datea=&dateb=&company=&type=&SIC=&State=&Country=&CIK=&owner=include&accno=&start=40&count=40
EDGAR Parameters
Clicking the “RSS Feed” button appended &output=atom to the URL and created a nice format that we will be able to read with PowerShell in a bit. Below are all the parameters that I found.
- Company
- CIK
- Type
- Owner
- Count
- Action
- DateA
- DateB
- SIC
- State
- Country
- AccNo
- Start
- Output
These are many more parameters than I needed so I didn’t bother to look for documentation, but I’m sure there is more functionality built into EDGAR if you look further.
Since we want all S-1 filings of recent companies with no further filtering, the parameters that we need are only a few.
Output
“Atom” - The RSS feed standard.
Action
“GetCurrent” - Reveals the most recent filings, the action is for the system to differentiate between the other types of searches available, for example there is also support for looking up a specific company.
Type
“S-1” - Filtering the many types of filings to give us only what we need. Note that this does match on anything including S-1, meaning we also get hits on other things such as S-1/A, another filing that amends or adds to a previous S-1 filing, but we can filter that out later.
Weaving Automation Together
Now that we have our data source and the URL to it completed we are ready for some PowerShell! Since the RSS feed is XML-based we can simply use our favorite command to get web content and PowerShell will format the results into nice XML objects for us.
PipeHow:\Blog> Invoke-RestMethod "https://www.sec.gov/cgi-bin/browse-edgar?action=getcurrent&type=S-1&output=atom"

title    : S-1/A - Jerrick Media Holdings, Inc. (0001357671) (Filer)
link     : link
summary  : summary
updated  : 2020-09-02T10:19:17-04:00
category : category
id       : urn:tag:sec.gov,2008:accession-number=0001213900-20-024940

title    : S-1/A - Hall of Fame Resort & Entertainment Co (0001708176) (Filer)
link     : link
summary  : summary
updated  : 2020-09-02T09:31:10-04:00
category : category
id       : urn:tag:sec.gov,2008:accession-number=0001213900-20-024930

[...]
Invoke-RestMethod will only take the actual content and no metadata, and it will format the data as well as it can, which is almost always well enough. I removed most of the results above, but if you run the same command or browse the link manually you will see that it matches the results nicely, except of course for the actual companies, since there will likely be other ones when you read this.
We now have the data, the next question is of course what to do with it!
I’ve previously blogged about Azure and some of the many services on there, and this won’t be the last time either. Today I thought that we could utilize a few of the services to enable our serverless automation.
Azure Functions
We can create a public API endpoint running PowerShell that we can call to get new S-1 filings from the RSS feed, and compare them with previous results.
Azure Storage Account
Together with the function that will run our code we can create a table to store our data in. This lets us match entries and make sure that when we present the data it only includes new filings.
Azure Logic App
Azure Logic Apps lets us automate a process with a simple GUI and pre-built connectors to many services inside and outside of Azure. We will schedule it to trigger our function and email the new results.
The Code
First off we’ll create the Azure Function App and storage account in Azure, and then locally write the code for a function with an HTTP trigger and an HTTP output binding. If you haven’t created a PowerShell function in Azure before, I wrote about it!
![]()
In the storage account that we created together with the function app I created a table that we will use to store all unique S-1 filings that we find.
Let’s open Visual Studio Code and create the function locally using the Azure Functions extension. Reading from Azure Table Storage using PowerShell is simple, and I wrote about that before too. If you haven’t checked that out, feel free to read up on it if you’re interested in some of the inner workings of the table reading and writing in the code below!
using namespace System.Net

# Input bindings are passed in via param block.
param($Request, $TriggerMetadata)

# Connect to table using the connection string in the application setting AzureWebJobsStorage
$Context = New-AzStorageContext -ConnectionString $env:AzureWebJobsStorage
$Table = Get-AzStorageTable -Context $Context
# Read all previously stored S1 filings
$StoredS1s = Get-AzTableRow -Table $Table.CloudTable -PartitionKey 'IPO' | Select-Object Name, Link, Time, Id

# Get all recent S1 filings from SEC
$Results = Invoke-RestMethod 'https://www.sec.gov/cgi-bin/browse-edgar?action=getcurrent&type=S-1&output=atom'
# Filter out anything not matching exactly S1, create hashtables with properties
$RecentS1s = $Results | Where-Object { $_.category.term -eq 'S-1' } | ForEach-Object {
    @{
        # Use regex to get only the company name from the title
        Name = $_.title -creplace '.+ - (.+) \(.+\) \(.+\)', '$1'
        Link = $_.link.href
        Time = Get-Date $_.updated -Format 'yyyy-MM-dd hh:mm:ss'
        Id   = $_.id
    }
}

# Add all new S1 filings not already in the table and save to a list for output
$Body = foreach ($S1 in $RecentS1s.Where({ $_.Id -notin $StoredS1s.Id })) {
    Write-Output $S1
    $null = Add-AzTableRow -Table $Table.CloudTable -PartitionKey 'IPO' -RowKey $S1.Id -Property $S1
}

# Associate values to output bindings by calling 'Push-OutputBinding'.
Push-OutputBinding -Name Response -Value ([HttpResponseContext]@{
        StatusCode = [HttpStatusCode]::OK
        Body       = $Body
    }
)
Let’s go through the code step by step!
- We use the
System.Netnamespace for the web output at the end of the code - We define parameters since it’s required for the function to work
- Using a default application setting we get previous entries from the table
- We gather all the S-1 filings from the EDGAR system on the SEC’s site
- We filter filings on type and create hashtables with
Name,Link,TimeandId - For each new S-1 filing found that is not in the table, we create an entry
- We output new filings as a response to the caller of the function, the logic app
Using the same extension that we used to create the function app in VS Code we can now upload the code to it.
Since the code is now accessible as a public API endpoint, we can create the last part to wrap up our automated process!
The Process
Azure Logic Apps is a service in Azure that I haven’t touched on too much on the blog so far. It’s a so-called “low code” way to automate processes and for today’s purpose it’s a perfect match! It has many pre-built connectors and integrations for other services in Azure which means we won’t have to write code to schedule it, format our results or send the email.
Our aim for the first step of our scheduled process is a trigger that, perhaps once a week, starts the function we just wrote and emails the results.
Enter the Logic App Designer!
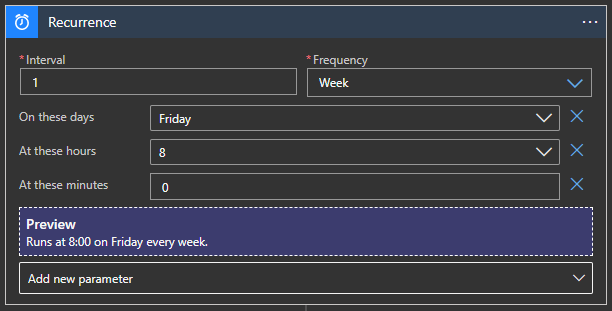
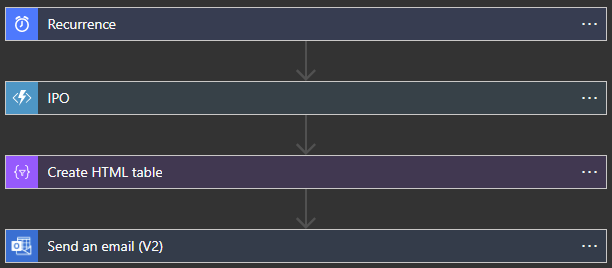
The designer is a simple GUI that lets us add triggers and actions. In this case I added a recurring trigger that runs it every Friday morning, to finish the week with some companies to look up during weekend if desired. If I change my mind, I can simply go into the designer and edit it.
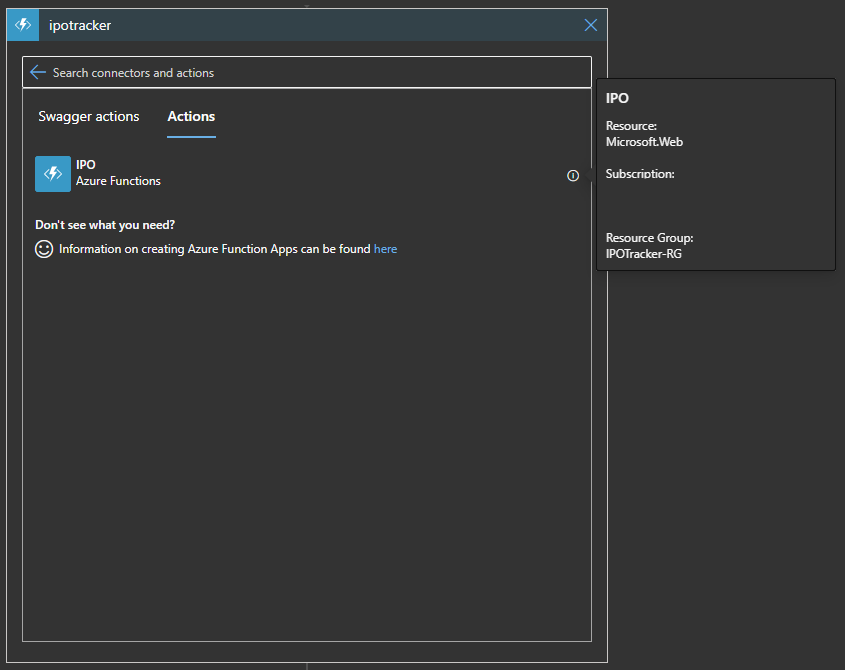
The next step is to trigger our function and get the new results from it. Lucky for us there is an integration between the services there as well, and we can simply add our function as the first action of our logic app!
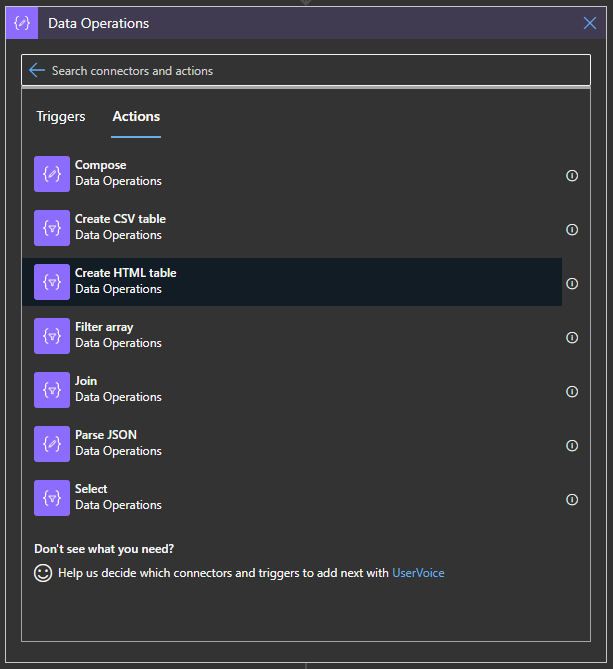
The logic app will manage the data that our function returns, and lets us manipulate, format and throw it around as we wish. In our case we want to present it as an email. There are a lot of nifty functions that we can utilize, and since we’re sending it as an email we can format it as a HTML table.
Once we add the action we can see that we have two fields to fill in, From and Columns. In our case we want to use the output, called the body, of the function as the source, and let the properties of the objects returned decide our column names.
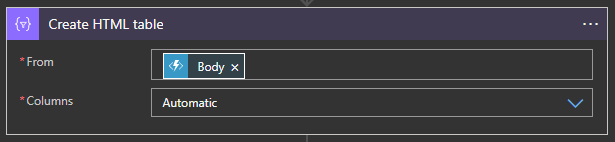
The logic app connector will manage reading the objects and formatting everything for us, so all we need to do now is to email the table.
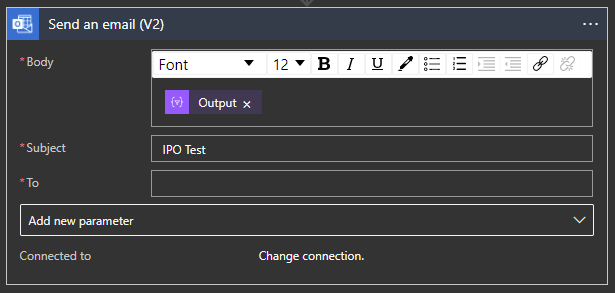
To use the email connector you need to connect a valid email account, but for the body of the email all you need to do is to add the output from the previous step.
Logic Apps is a great service to visually design your automation with little effort. It can do a lot more than I showcased here and has support for loops, different logical paths and conditions and it even has built-in functions that lets you manage your data in whatever way you need throughout the process.
To test the logic app and send the email you can simply press run, or at the time of writing, wait until tomorrow which is Friday!
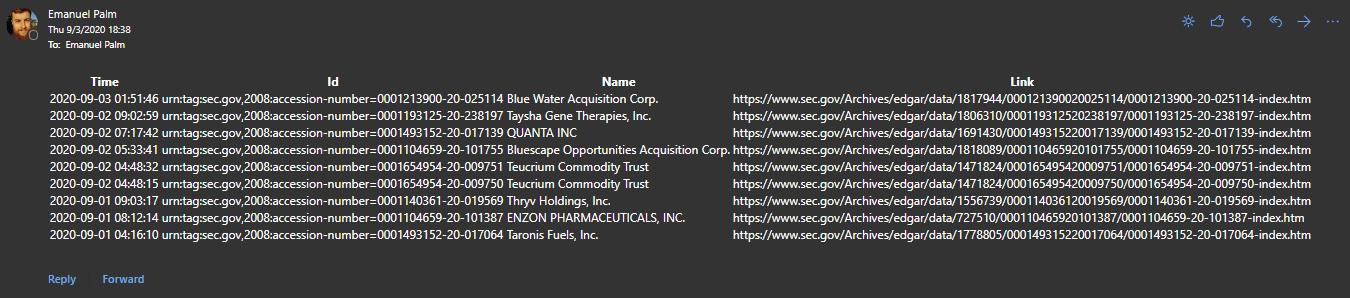
Final Thoughts
As always there are many ways that this can be improved. I could look up more information on each company separately and add a summary of their operations, I could use web scraping to link directly to the A-1 filing document and I could make the email a lot prettier. As you can see in the email above, some companies have several S-1 filings, which could also be grouped together and displayed in a nicer way.
The most important thing is that this is a good start, and that we learned something, whether it’s regarding PowerShell, Azure or even the stock market!
Now I just need to learn how to read the filings, but that’s a separate matter entirely.