Azure Workload Identity Federation
- 'Federated or Client Credentials?'
- 'Trusting External Platforms'
- 'Configuring a Federated Credential'
- 'Using a Federated Credential'
- 'Conclusion'
Workload identity is an overloaded term. If I asked 10 people for a definition I’d likely get 10 different answers.
It’s that Kubernetes identity thing, isn’t it?
Yes, kind of.
It’s a license in Entra, right?
Yes. It was renamed though, but you should consider getting Premium.
It’s a general term for identities associated with a software workload.
Ding ding ding, that’s my kind of definition!
They’re all correct, and there are more correct answers too (which makes it only slightly confusing), but today we’ll take a look at what people usually mean, with examples in both Azure DevOps Pipelines and GitHub Actions using my module AzAuth.
Federated or Client Credentials?
When people say workload identity, what they usually mean is the pattern of workload identity federation, regardless of the somewhat agreed-upon definition in the introduction of this post.
When people say workload identity federation, what they actually mean is a client credentials authentication flow with a federated credential.
If “federated credential” sounds familiar, you may have either been on the internet in the past 6 months (because everything is starting to support them), or seen them on your service principals or user-assigned managed identities, which is where we can enable this flow.
For user-assigned managed identities it’s the only credential option available.
For service principals it’s right next to the certificates and client secrets.
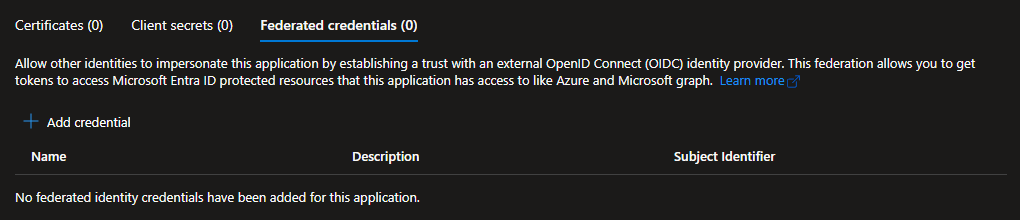
While those seem like very different credentials, they have more in common than being in the same menu in the Azure Portal. All three credential types use the same client credentials authentication flow, just different versions.
If you want a better understanding of authentication in Azure, I wrote a post about the fundamentals and the different authentication flows.
Trusting External Platforms
Entra implements an extension to OAuth 2.0 called Open ID Connect (OIDC). If an external platform also implements OIDC, we can use the pattern of workload identity federation to configure a workload identity in Entra to trust a specific identity in an external platform.
A common use case for this is to manage Azure resources from external platforms such as:
- Azure DevOps (which is its own identity provider, separate from Entra)
- GitHub
- Kubernetes
- Google Cloud
- Any other platform implementing OIDC
Compared to other authentication methods this is incredibly useful, because:
- We don’t need to keep track of secrets, like API keys or passwords.
- We limit the sources from where the identity can be used.
Authentication Flow Overview
Azure DevOps is used as an example in the illustration below, but it could be any external platform implementing OIDC assuming their tokens match the client assertion format.
- The pipeline in Azure DevOps requests a token to prove its identity.
- Azure DevOps answers with an ID token for the pipeline.
- The pipeline asks for an access token from Entra, providing its ID token.
- Entra checks if trust exists between the workload identity and the pipeline.
- If trust exists, it asks Azure DevOps (issuer) to validate it.
- Azure DevOps confirms that it’s a valid token for the pipeline (subject).
- Entra issues a new access token for the workload identity.
Once the token exchange has been made, the pipeline is free to act as the workload identity and operate on Azure resources.
Configuring a Federated Credential
If we configure our credential through the Azure Portal, we’re given some help regarding the different scenarios.
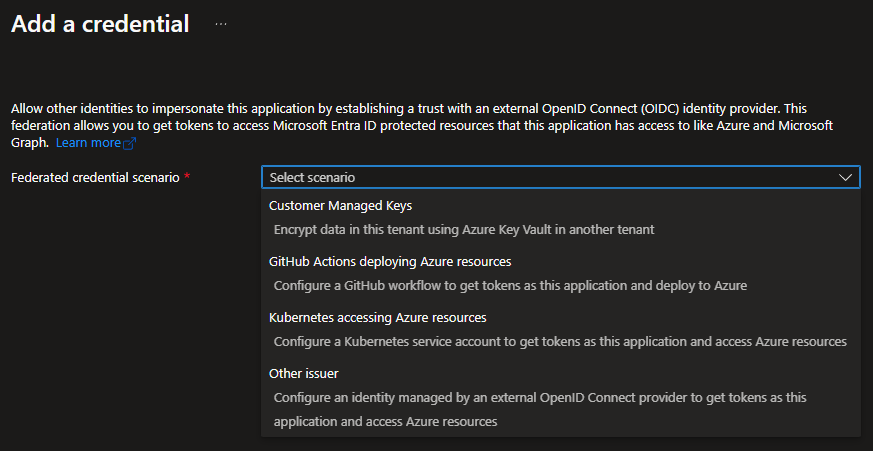
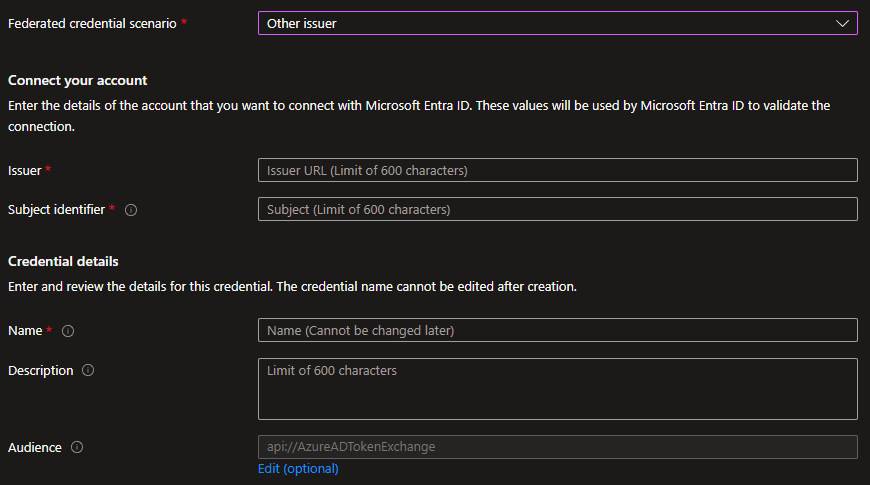
All options except “Other issuer” are just ways to help you fill out the information. In fact, you could use that last option for every scenario if you wanted to.
Selecting that option presents us with all the fields that we actually need to set. If we would do it using the API instead, this is the same information we would need to specify.
Let’s take a look at examples first for Azure DevOps Pipelines and then GitHub Actions.
Azure DevOps Setup
Taking a pipeline in Azure DevOps as an example scenario, we actually need to configure it from two ways. Not only the federated credential, but we also need to create and configure a service connection in our Azure DevOps organization to use it.
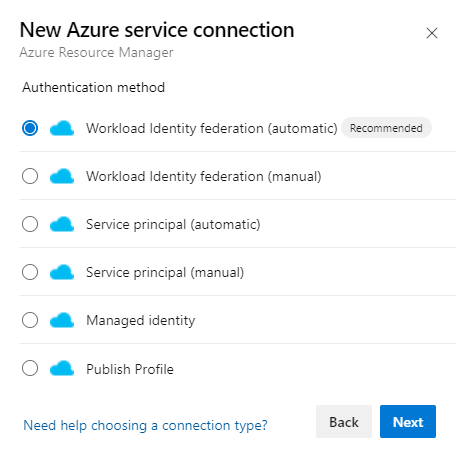
If we have the access to create the identity in Entra, we can use the automatic option and let Azure DevOps create a new identity and the federated credential for us.
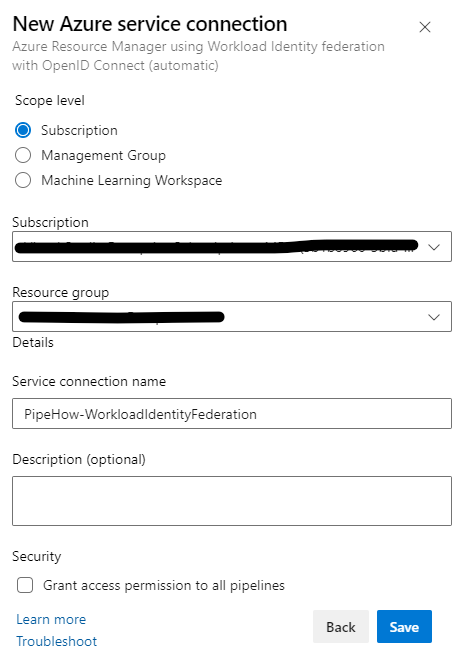
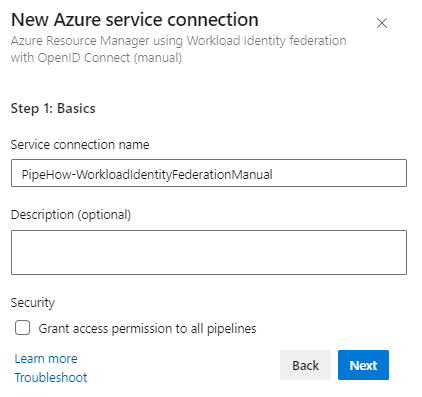
Otherwise we’ll have to create the service connection and credential manually, which we do in a few different steps.
First give the service connection a name and an optional description.
In the second step we get the information that we need to configure our federated credential for our identity in Entra.
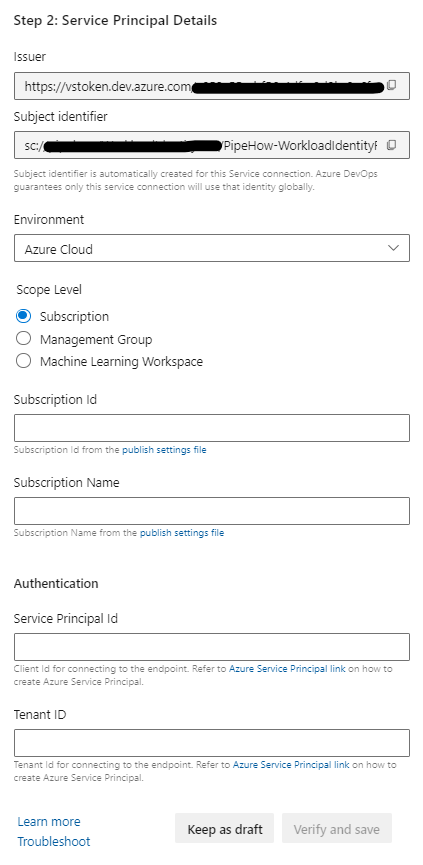
Copy or write down the issuer and subject identifier for now, then head back and fill out your federated credential with that information. Save the service connection meanwhile as a draft if you need to.
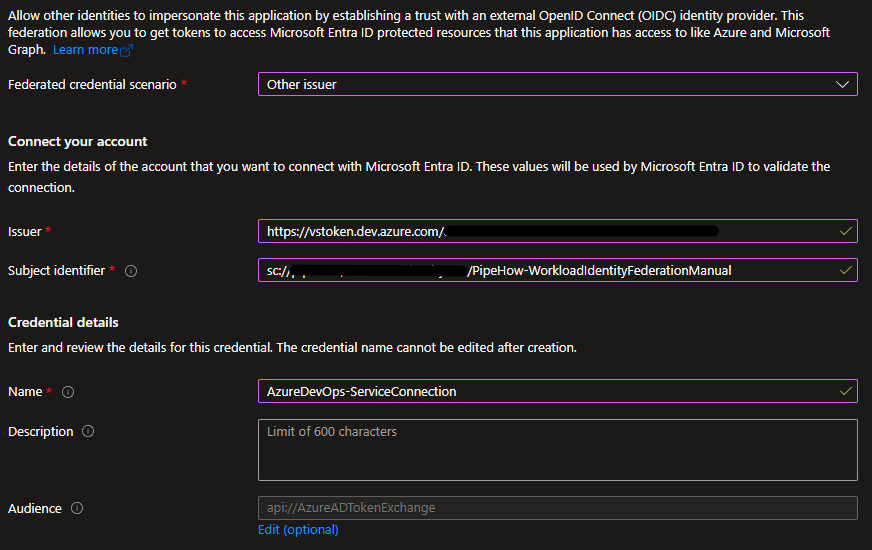
Save the federated credential once you’ve entered the information, and then head back to your service connection to finish the setup. You’ll need the name and id of your subscription or management group (or machine learning workspace), the client id for your identity, and the id of your tenant.
When you save the service connection, Azure DevOps is going to reach out to Entra for a handshake to finish the configuration and ensure that the trust is established.
NOTE: If you’re using conditional access policies to restrict which IP addresses service principals can authenticate from (using the Workload ID Premium features), you need to make a temporary change to allow Azure DevOps to authenticate for the initial handshake from the IP addresses in the region of your organization, even if you’re using self-hosted agents since this request is not made from a pipeline agent but from the Azure DevOps service itself.
Before having a look at how to use the workload identity from a pipeline, let’s take a look at how to configure a federated credential for GitHub.
GitHub Actions Setup
When choosing scenario for our federated credential in the Azure Portal, GitHub is one of the scenarios where we’re given a bit of extra help to configure it.
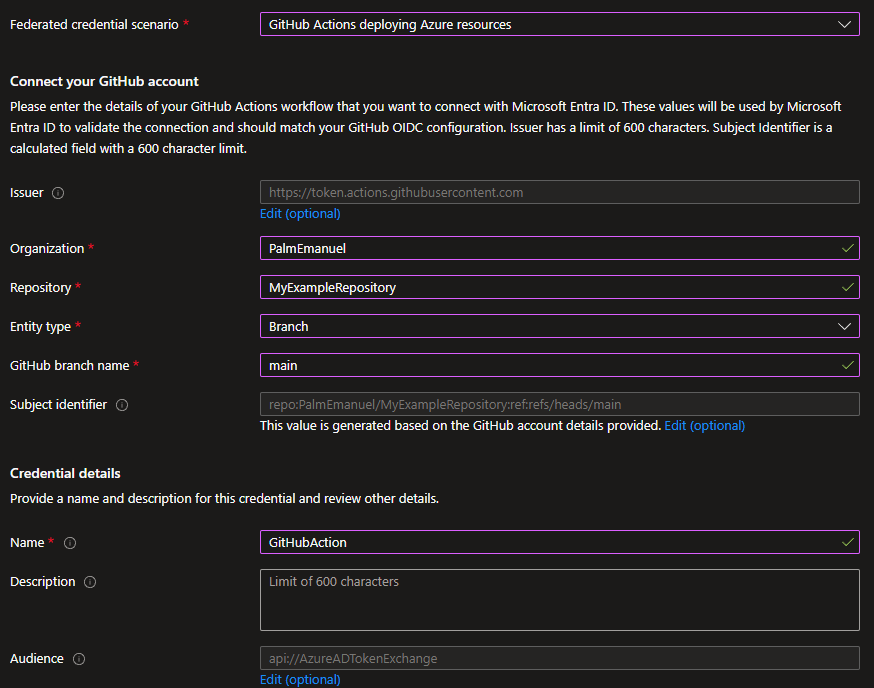
As mentioned earlier, we could still configure it with the same information in the “Other issuer” scenario, but this way we get some extra clarity regarding the options.
The main thing to think about is where how GitHub Action will run. Will it run on a specific branch, on a pull request, in a specific environment? This determines the subject of the id token once the workflow retrieves it, and it has to match our federated credential.
Compared to the whole service connection dance for Azure DevOps, GitHub has fewer parts to setup, so let’s move on to how the pipeline code might look for the platforms.
Using a Federated Credential
Once we’ve set up the federated credential on our identity, we can use it from the platform we’ve configured. We could add up to 20 federated credentials on a single identity, so technically we could set up one single workload identity that could be used from both Azure DevOps and GitHub at the same time.
Azure Pipeline
When we configure our pipelines in Azure DevOps it’s advantageous to do so using yaml, since it lets us version control it together with the rest of our code.
A simple pipeline to get a token using AzAuth in PowerShell could look like this:
trigger:
- main

pool:
  vmImage: ubuntu-latest

steps:
- task: AzurePowerShell@5
  env:
    SYSTEM_ACCESSTOKEN: $(System.AccessToken)
  inputs:
    azureSubscription: '<my-service-connection>'
    pwsh: true
    azurePowerShellVersion: 'LatestVersion'
    ScriptType : 'InlineScript'
    Inline: |
      # These are here as an example, and would be better set as parameters or variables for your pipeline
      $ClientId = '<client-id>'
      $TenantId = '<tenant-id>'

      # An improvement would be to not install the module each run
      Install-Module AzAuth

      # The service connection ID can be found stored in any of the environment variables named ENDPOINT_DATA_<ServiceConnectionId>_<Something>URL
      try {
          $ServiceConnectionId = (Get-ChildItem -Path Env: -Recurse -Include ENDPOINT_DATA_*)[0].Name.Split('_')[2]
      } catch {
          throw "Unable to determine service connection ID!"
      }

      # Set up a URI for the Azure DevOps API endpoint to get the ID token from
      $Uri = "${env:SYSTEM_TEAMFOUNDATIONCOLLECTIONURI}${env:SYSTEM_TEAMPROJECTID}/_apis/distributedtask/hubs/build/plans/${env:SYSTEM_PLANID}/jobs/${env:SYSTEM_JOBID}/oidctoken?serviceConnectionId=${ServiceConnectionId}&api-version=7.1-preview.1"

      $InvokeSplat = @{
        'Uri' = $Uri
        'Method' = 'POST'
        'Headers' = @{
          'Authorization' = "Bearer $($env:SYSTEM_ACCESSTOKEN)"
        }
        'ContentType' = 'application/json'
      }
      $OidcToken = (Invoke-RestMethod @InvokeSplat).oidcToken

      $AccessToken = Get-AzToken -WorkloadIdentity -ExternalToken $OidcToken -ClientId $ClientId -TenantId $TenantId
Worth noting is that we’re only able to utilize our service connections from certain tasks that are enabled for it. In this case Get-AzAccessToken from the Az.Accounts module which is already available would work just as well and save us some code, but I think there’s some value in showing the full process of getting the id token as well.
To follow the process step by step, we first need to be able to utilize the access token for our pipeline, available to our task through the SYSTEM_ACCESSTOKEN environment variable. Using this token, we can request an OIDC token, or id token, for our specific pipeline. This token is the one we need to exchange with Entra for an access token for our workload identity, which we do using the AzAuth module.
GitHub Action
GitHub Actions are also written using yaml, although a slightly different syntax.
Below is an embedded existing workflow for my module AzAuth where I use workload identity federation to test the module automatically when a new pull request is made to the module.
It’s set up so that all pull requests are able to use the secrets in the repository, but only after my approval so that no secrets are exposed to malicious code. It has two jobs, inspired by this blog post.
The first one allows me to enforce an approval gate before the workflow continues.
The second one is where the workload identity federation comes in. In GitHub we need to ensure that the pipeline token has permission to request an OIDC, or id token, done by setting id-token to write under permissions. This can be done on different scopes, in this case I make sure to only set it for the second job.
Then we can use the environment variables ACTIONS_ID_TOKEN_REQUEST_URL and ACTIONS_ID_TOKEN_REQUEST_TOKEN to request an id token for our workflow. Once we have that we can request an access token for our workload identity from Entra using AzAuth, assuming that we configured the federated credential correctly, in this case by pull request.
Conclusion
If you haven’t taken a look at using workload identity federation for your pipelines or workflows, or even Kubernetes workloads, now is the time! It’s easier than ever to get started, and it cuts down on a lot of the less secure parts of authentication, like managing passwords and keys.
It even allows you to extend and explore new patterns of authentication between your services, and is in my opinion one of the most elegant solutions for many common cross-service workflows.